You learned how to self-host a WordPress site, reverse proxy it with Nginx Proxy Manager, and set it to access by Cloudflare IP only in the previous article. However, exposing your port 443 to the public internet may become a potential security risk.
This article will teach you how to use Cloudflare Tunnel to let Cloudflare access your docker container service directly so that you don’t need to expose your HTTP (80) and HTTPS (443) ports to the public internet anymore.
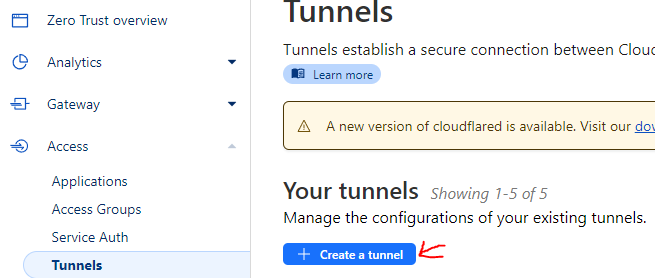
Step 1: Go to Zero Trust on Cloudflare. Select Tunnels under the Access section and click the Create a tunnel button.
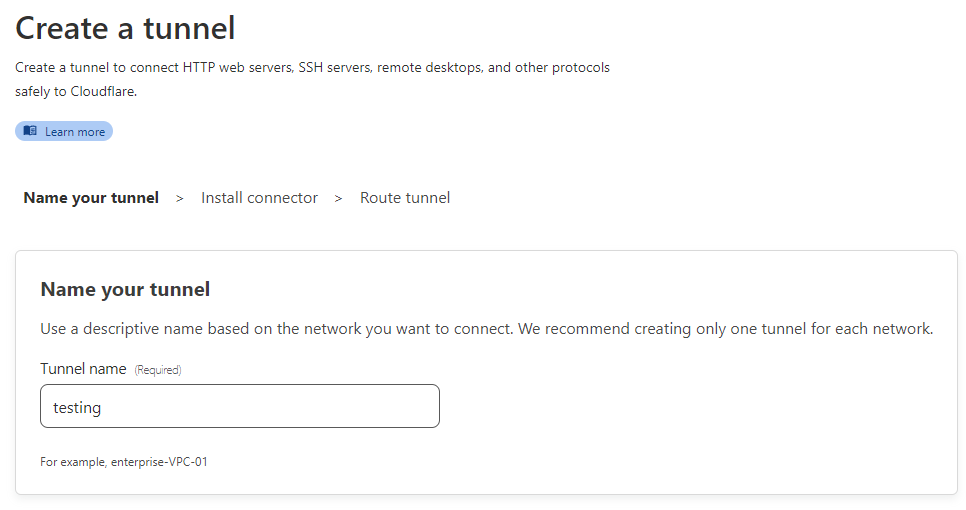
Step 2: Give a name to your Cloudflare Tunnel.
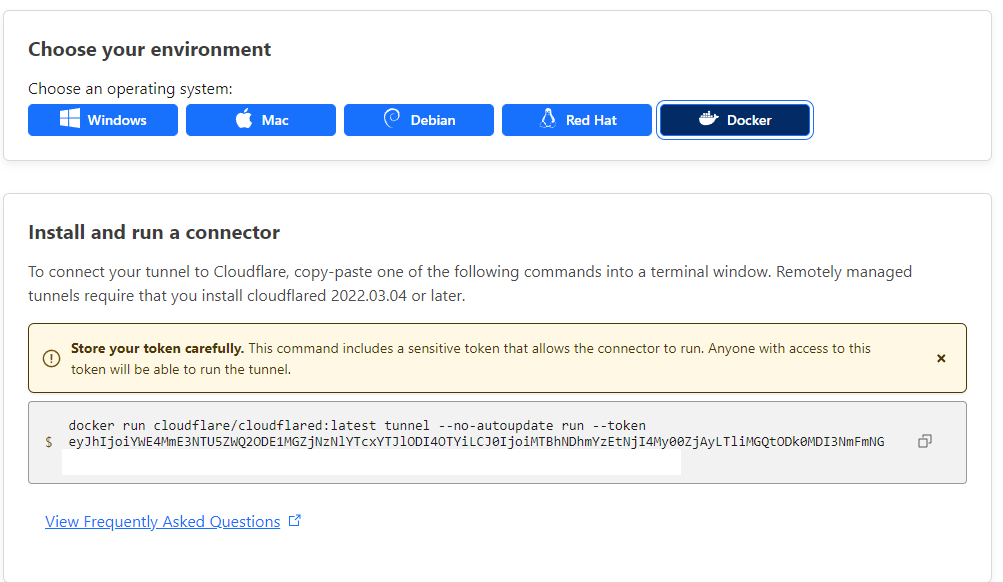
Step 3: It will show you your Cloudflare Tunnel Token. In my case, it is a string starting with eyJh. Jot it down, and it will be used later.
Step 4: Modify the docker-compose.yml file from the previous article.
sudo nano docker-compose.yml
version: '3'
services:
  app:
    image: 'jc21/nginx-proxy-manager:2.9.18'
    hostname: npm
    container_name: npm
    restart: unless-stopped
    ports:
      - '81:81'
      - '443:443'
    volumes:
      - ./data:/data
	  - ./letsencrypt:/etc/letsencrypt
    networks:
      - npm

  mysql:
    image: mysql:8.0
    hostname: mysql
    container_name: mysql
    env_file: .env
    environment:
      MYSQL_ROOT_PASSWORD: ${MYSQL_ROOT_PASSWORD}
      MYSQL_DATABASE: ${MYSQL_DATABASE}
      MYSQL_USER: ${MYSQL_USER}
      MYSQL_PASSWORD: ${MYSQL_PASSWORD}
    volumes:
       - mysql:/var/lib/mysql
    networks:
      - npm

  wordpress:
    image: wordpress:6.2-php8.0-apache
    hostname: wordpress-1
    container_name: wordpress-1
    ports:
      - 8080:80
    environment:
      WORDPRESS_DB_HOST: mysql
      WORDPRESS_DB_USER: ${MYSQL_USER}
      WORDPRESS_DB_PASSWORD: ${MYSQL_PASSWORD}
      WORDPRESS_DB_NAME: ${MYSQL_DATABASE}
    networks:
      - npm

  tunnel:
    image: cloudflare/cloudflared
    hostname: cloudflared
    container_name: cloudflared
    restart: unless-stopped
    command: tunnel run
    environment:
      TUNNEL_TOKEN: ${CLOUDFLARE_TOKEN}
    networks:
      - npm

volumes:
  mysql:

networks:
  npm:
    name: npm_network
Press Ctrl + X to save the file.
Step 5: Edit the .env file from the previous article. Add a line with CLOUDFLARE_TOKEN. Remember to use your Cloudflare token jotted down in Step 3.
sudo nano .env
MYSQL_ROOT_PASSWORD="your_mysql_root_password"
MYSQL_USER="your_mysql_user"
MYSQL_PASSWORD="your_mysql_user_password"
MYSQL_DATABASE="your_wordpress_db1"
CLOUDFLARE_TOKEN="eyJhIjoiYWE4MmE3NTU5ZWQ2ODE1MGZjNzNlYTcxYTJlODI4OTYiLCJ0IjoiMTBhNDhmYzEtNjI4My00ZjAyLTliMGQtODk0MDI3NmFmNG"
Press Ctrl + X to save the file.
Step 6: Rebuild the docker containers by
sudo docker compose up -d
Step 7: You will discover a connector has been added to your Cloudflare Tunnel.

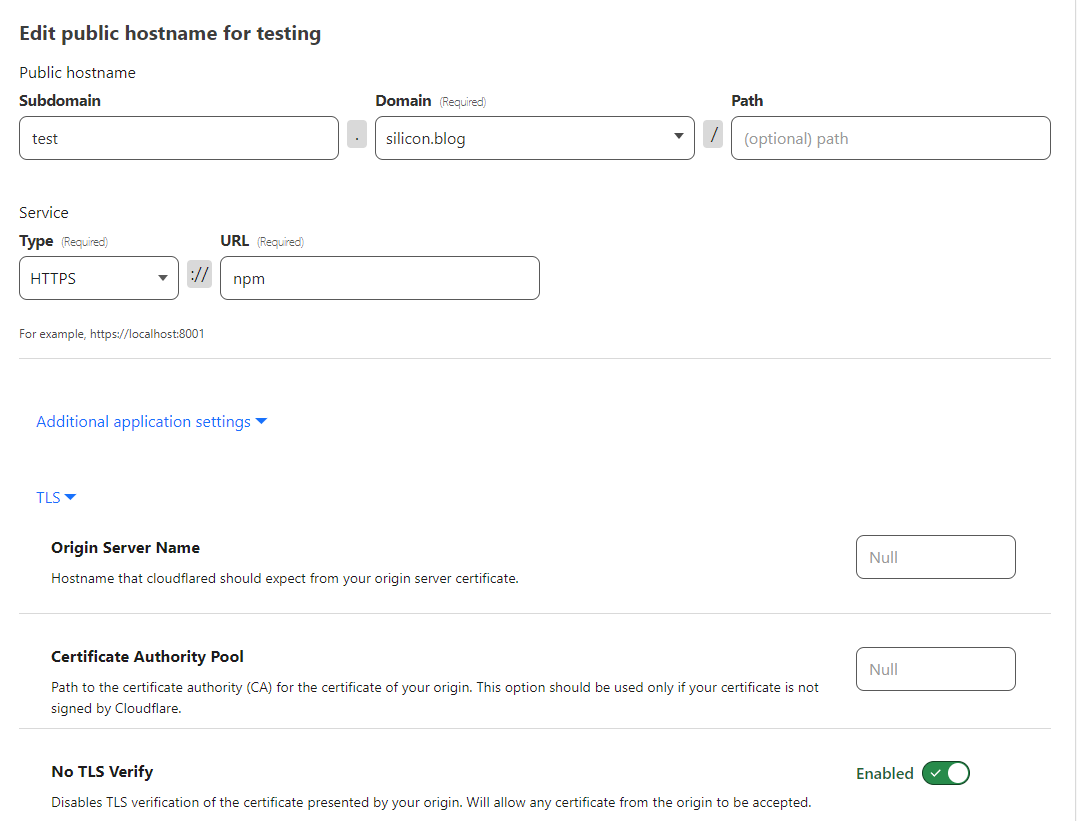
Step 8: Add your WordPress domain. If you have set up a record before, you may need to remove it on your Domain DNS page first.
If you utilize the docker-compose.yml provided above, the service type and URL will be the same as the following image. Remember to enable the No TLS Verify. Otherwise, you may have 502 errors later on.
Enter your WordPress domain name on your browser.
If you can access it, congratulation, you are now secure your WordPress site through Cloudflare Tunnel, and you don’t have to expose your 443 (HTTPS) port to the public internet anymore!
Although you don’t have to expose your 443 (HTTPS) port to the public anymore, there is a privacy concern for Cloudflare Tunnel. Cloudflare has to decrypt the request to your domain first.
After that, it will encrypt the request and forward the traffic to you. It implies Cloudflare can read all the data passthrough the Cloudflare Tunnel.
I believe Cloudflare follows GDPR and CCPA strictly and will not collect and resell those data, but you have the right to know Cloudflare can decrypt and access your data through Cloudflare Tunnel.
Moreover, Cloudflare Tunnel could access your docker container service directly, bypassing your server firewall. Leave a comment below if I misunderstood anything.
Both methods have pros and cons. It is your decision to expose your 80/443 port and let your firewall protect your Nginx Proxy Manager or to hide your 80/443 port but let Cloudflare access your sensitive data.
Hello, thank you for sharing this. Could I ask if this method will enable Cloudflare’s full encryption (strict) mode? I now try to use NPM to make this work. The way I thought that may works is to export a service port on localhost and use NPM to redirect it to https, then connect it to CloudFlare tunnel. I don’t know if this will work.
Dear Hermes Chen,
Sorry for the late reply, I was on a vacation for a whole month.
You will need to enable Cloudflare’s full encryption (strict) mode by yourself on your domain’s SSL/TLS overview section.
Your method may work but I would suggest you use Full (without strict) mode first.
Ensuring everything works properly before you switch to Full (strict) mode.
My current setup is Cloudflare tunnel (Proxied) -> Load balancer (NPM) -> node1/node2 (NPM) -> Nginx https server (WordPress server).