This article is based on this post. Since it’s dated, this article will update some steps so that Tinc could work on Proxmox 7.
Proxmox Cluster uses corosync to synchronize each node. The corosync process itself is critical for latency. It is recommended the latency between each node is less than 10ms. If your devices are not in the same city and have very high latency, your devices may encounter frequent disconnection due to the corosync process being out of synchronization. You may check out my other article on how to reduce latency when forming Proxmox Cluster using VPN.
Prerequisite
MAKE SURE TO BACKUP ALL YOUR VMS!
Setup port forwarding TCP/UDP 655 under your router

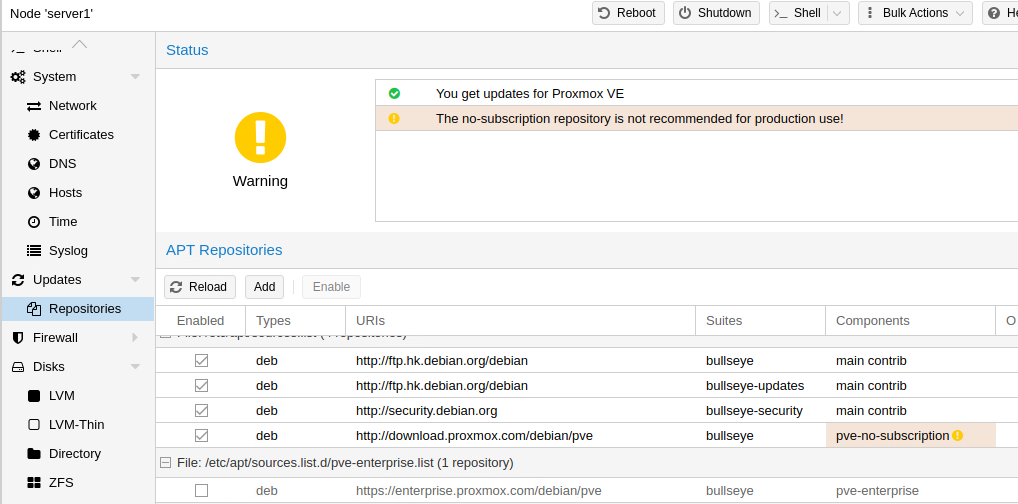
Remember to disable pve-enterprise repository if you are using promox for personal use.
Step 1: SSH into your Proxmox server
Jot down your host name by
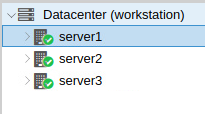
nano /etc/hostnameIn my case, I have three host servers named server1, server2 and server3 respectively.
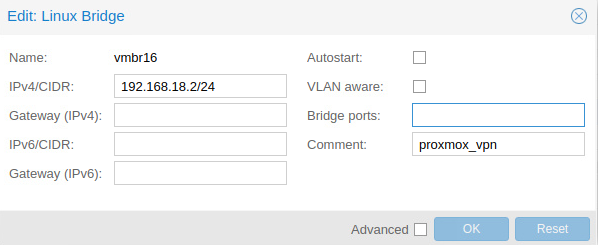
Step 2: Create a Linux bridge (vmbr16 in my case), assign a specific ip address to each host server

192.168.18.2/24, 192.168.18.3/24, 192.168.18.4/24 will be assigned to server1, server2 and server3 correspondingly.
IP range of tinc: 192.168.18.0/24 (192.168.18.1–192.168.18.254).
Step 3: Update the list of available packages & install Tinc, Net-tools packages
apt-get install tinc -y
apt-get install net-tools -y
Step 4: Create a hosts directory for tinc
mkdir -p /etc/tinc/vpn/hostsStep 5: Generate configuration files for your host servers
On server1,
cat > /etc/tinc/vpn/tinc.conf <<EOF
Name = server1
AddressFamily = ipv4
Device = /dev/net/tun
Mode = switch
ConnectTo = server2
ConnectTo = server3
EOF
Similarly, on server2
cat > /etc/tinc/vpn/tinc.conf <<EOF
Name = server2
AddressFamily = ipv4
Device = /dev/net/tun
Mode = switch
ConnectTo = server1
ConnectTo = server3
EOF
On server3
cat > /etc/tinc/vpn/tinc.conf <<EOF
Name = server3
AddressFamily = ipv4
Device = /dev/net/tun
Mode = switch
ConnectTo = server1
ConnectTo = server2
EOF
Step 6: Createa profile on EACH host server
cat > /etc/tinc/vpn/hosts/server1 <
Port = 655
Compression = 0
EOF
cat > /etc/tinc/vpn/hosts/server2 <
Port = 655
Compression = 0
EOF
cat > /etc/tinc/vpn/hosts/server3 <
Port = 655
Compression = 0
EOF
Step 7: Generate a private & public key for EACH server. The default settings should be correct.
tincd -n vpn -K409
Step 8: Generate the tinc-up & tinc-down script
Modify vmbr16 to the name of your Tinc Linux bridge (refer to Step 2 if you don’t know what’s the name of your Linux bridge).
nano /etc/tinc/vpn/tinc-up#!/bin/bash
# Attach the 'vpn' interface to vmbr16
/sbin/ifconfig vpn up
/sbin/brctl addif vmbr16 vpn
# Set a multicast route over vmbr16
/sbin/route add -net 224.0.0.0 netmask 240.0.0.0 dev vmbr16
# To allow VMs on a private IP to access the Internet (via vmbr0):
/sbin/iptables -t nat -A POSTROUTING -o vmbr0 -j MASQUERADE
# To allow IP forwarding:
echo 1 > /proc/sys/net/ipv4/ip_forward
# To limit the chance of Corosync Totem re-transmission issues:
echo 0 > /sys/devices/virtual/net/vmbr16/bridge/multicast_snoopingAgain, modify vmbr16 to the name of your tinc linux bridge (refer to Step 2 if you don’t know what’s the name of your linux bridge).
nano /etc/tinc/vpn/tinc-down#!/bin/bash
/sbin/route del -net 224.0.0.0 netmask 240.0.0.0 dev vmbr16
/sbin/brctl delif vmbr16 vpn
/sbin/ifconfig vpn down
echo 0 > /proc/sys/net/ipv4/ip_forwardStep 9: To communicate with other servers through Tinc, each host server’s public key should be distributed to other servers.
Copy the content from server1 to other servers.
nano /etc/tinc/vpn/hosts/server1
Address = <server 1 public ip address e.g. 192.168.18.2 or ddns e.g. your-domain.ddns.net>
Port = 655
Compression = 0
-----BEGIN RSA PUBLIC KEY-----
... <server 1 public key>
-----END RSA PUBLIC KEY-----
Similarly, copy the content from server2 to other servers.
nano /etc/tinc/vpn/hosts/server2
Address = <server 2 public ip address e.g. 192.168.18.3 or ddns e.g. your-domain-2.ddns.net>
Port = 655
Compression = 0
-----BEGIN RSA PUBLIC KEY-----
... <server 2 public key>
-----END RSA PUBLIC KEY-----
Perform the same action from server3 to other servers.
nano /etc/tinc/vpn/hosts/server3
Address = <server 3 public ip address e.g. 192.168.18.4 or ddns e.g. your-domain-3.ddns.net>
Port = 655
Compression = 0
-----BEGIN RSA PUBLIC KEY-----
... <server 3 public key>
-----END RSA PUBLIC KEY-----
Step 10: Make tinc-up, tinc-down executable.
chmod +x /etc/tinc/vpn/tinc-up
chmod +x /etc/tinc/vpn/tinc-down
Step 11: When Tinc starts, the contents in the “vpn” sub-directory should be loaded
echo "vpn" >> /etc/tinc/nets.boot
service tinc restart
Step 12: Force promox using the private IP address rather than the public IP address.
cat > /etc/host.conf <<EOF
order hosts, bind
multi on
EOF
Step 13: Set up your own lookup table, copy it to each server
nano /etc/hosts
In my case, it looks like
192.168.18.2 server1.homes server1
192.168.18.3 server2.homes server2
192.168.18.4 server3.homes server3
Step 14: Enable tinc and start the tinc service on the start
systemctl enable tinc@vpn
systemctl start tinc@vpn
Step 15: Create a cluster on the first server
pvecm create <cluster-name>In my case, on server1
pvecm create workstationStep 16: Ensure other servers are empty (do not have any VM). Remote those servers and then
pvecm add <first server>In my case, on server2 and server3
pvecm add server1Step 17: Done