The process of creating a WiFi hotspot on Ubuntu is relatively easy. Once set up, you may use an industrial PC (IPC) as an All-in-one solution and save the space of having a router in an industrial environment. Other smart home or IOT sensors can connect to your IPC wirelessly through the Wifi hotspot.
The writer will use the TP-Link Archer T2U as the wireless adapter in this article. You may refer to this article and install its driver (TP-Link WL823N driver is also provided).
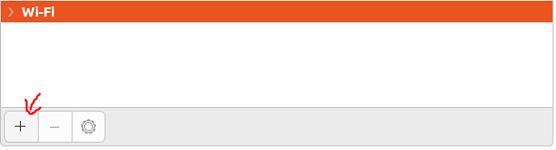
Step 1: On a terminal, enter
nm-connection-editorA window will be shown on the screen.
Step 2: Click the ‘+’ button.
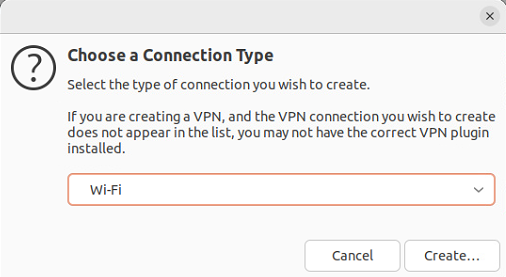
Step 3: Select Wi-Fi as the connection type.
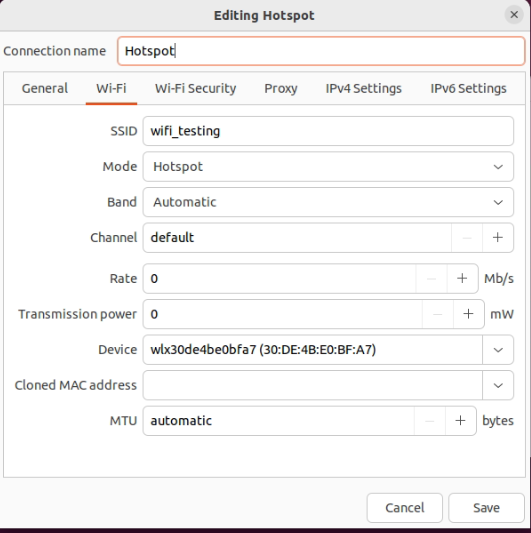
Step 4: Change the connection name to Hotspot.
Select Hotspot as the Mode.
Choose your WiFi card as the Device.
Modify the SSID.
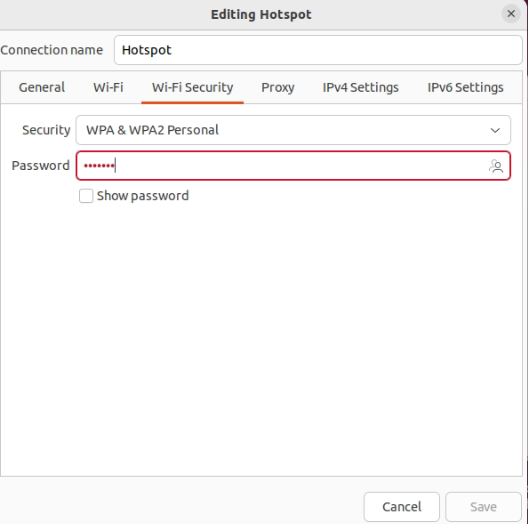
Step 5: Choose WPA & WPA2 Personal on the Security in the Wi-Fi Security section. Enter the WiFi password. Click Save after everything is done.
Step 6: Click on the top-right corner. Wi-Fi Hotspot Active will be shown.
![]()
Step 7: You may verify your WiFi card IP by
sudo apt install net-tools -y
ifconfig
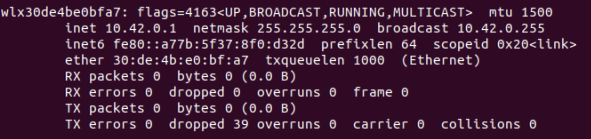
It should be 10.42.0.1 by default. Congratulation! You have successfully set up a WiFi hotspot on your Ubuntu Desktop 22.04 IPC!