OpenSSH added support for Ed25519-sk on version 8.2. It implies we can create our own SSH key pair using our Yubikey. With the help of Yubikey, we can remote into another device via SSH without remembering any passwords (passwordless authentication). This article will teach us how to generate a public/private key pair (ed25519-sk) with your Yubikey on Windows 10.
Step 1: Verify your OpenSSH version on a Command Prompt.
ssh -VStep 2: If your version is less than 8.2, such as OpenSSH_for_Windows_7.7p1, LibreSSL 2.6.5 or OpenSSH_for_Windows_8.1p1, LibreSSL 3.0.2. Remove and reinstall OpenSSH on your Windows 10 system.
On a Command Prompt, enter
ssh-keygen help
If ed255190sk is not on the list, you must install a newer version of OpenSSH.
I have tried the OpenSSH v9.1 and v9.2 versions, but there are some compatibility issues on Windows. This article will use the OpenSSH v8.9.1 version to generate our SSH key pair (ed25519-sk).
On your Windows PowerShell, remove OpenSSH by typing
Remove-WindowsCapability -Online -Name OpenSSH.Client~~~~0.0.1.0Download OpenSSH v8.9.1 on GitHub and install it on your Windows system.
Step 3: Open a Command Prompt, enter
ssh -VIf it returns
'ssh' is not recognized as an internal or external command, operable program or batch file.You may need to add OpenSSH to your Windows 10 Environment variable.
On the search bar, input
sysdm.cplEnter your OpenSSH path to the System variables.
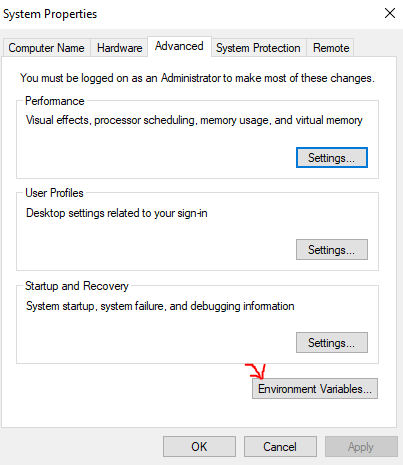

In my case, it is C:\Program Files\OpenSSH
Step 4: On a Command Prompt, enter
ssh-keygen help Your OpenSSH should now support ed25519-sk.
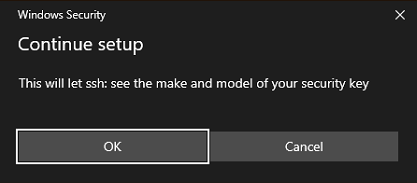
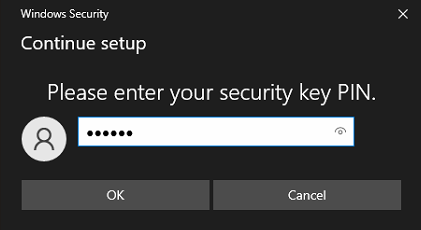
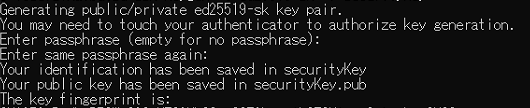
Step 5: Generate our SSH public and private key pair (ed25519-sk) on a Command Prompt using
ssh-keygen -t ed25519-sk -f securityKey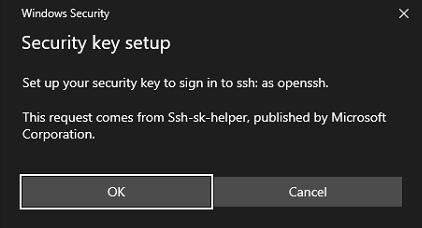
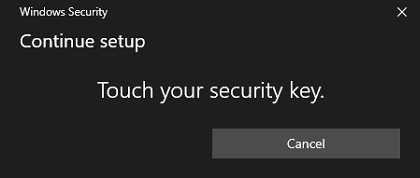
You may need to enter your security key PIN if you have set it up on Your Yubikey Manager.
Touch your Yubikey for confirmation.
You may enter a passphrase for your ed25519-sk key pair.
Step 6: Transfer your public key to another Linux device with the following command:
ssh your_username@your_device_ip "umask 077; test -d .ssh || mkdir .ssh ; cat >> .ssh/authorized_keys || exit 1" < securityKey.pubReplace your_username with your username and your_device_ip with your device IP.
For example,
ssh [email protected] "umask 077; test -d .ssh || mkdir .ssh ; cat >> .ssh/authorized_keys || exit 1" < securityKey.pubRepeat step 6 multiple times if you have numerous Yubikeys.
We can now configure an SSH key pair (ed25519-sk) with our Yubikey on Windows 10. In the next article, we will learn how to remote control a Virtual Machine via SSH using our Yubikey.